Master Home Style Using Drapes to Cover Walls Like a Pro

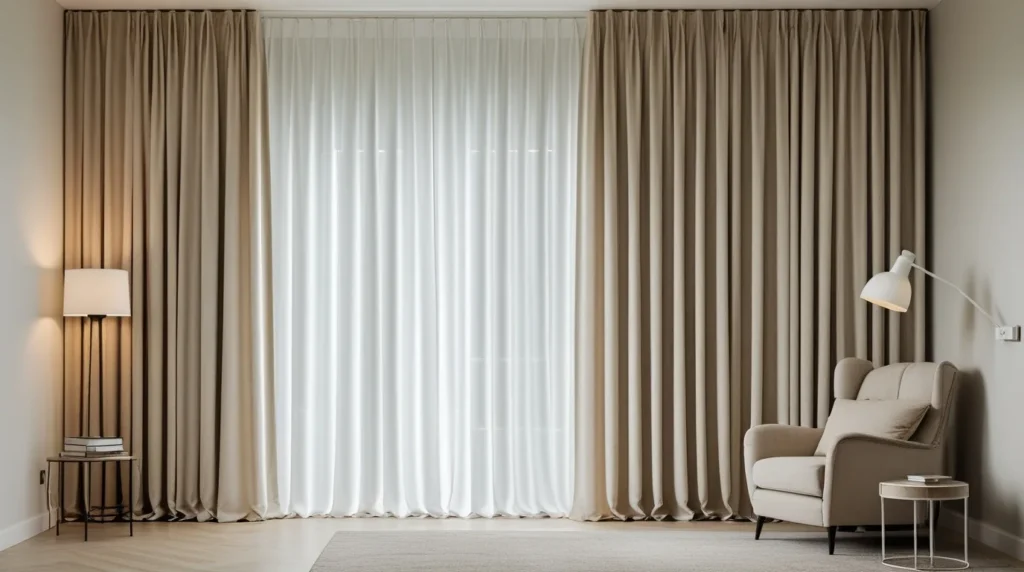
Why Drapes Are More Than Just Window Treatments


Using drapes to cover walls can change a room in ways you might not expect. Drapes do more than block light; they add color, texture, and life to any space. Imagine walking into a room with plain white walls and feeling it is cold or empty. Now picture that same room with soft, flowing fabric from floor to ceiling. The space feels warm, welcoming, and chic. Drapes can hide cracks, marks, or uneven paint.

They also help to dampen sound so your living room or bedroom feels cozier and less echoey. With the right drape choice, you can set a mood romantic, bold, or calm without painting or building. Drapes come in many fabrics: cotton, linen, velvet, and even sheer materials. Each fabric type brings its own look and feel. A heavy velvet drape gives a sense of luxury, while a light linen drape feels breezy and relaxed.

You can mix fabrics for a custom look. Best of all, hanging drapes is less work than building a new wall or buying art. A simple rod and some hooks are often all you need. When you learn how to use drapes creatively, you open many design doors without major cost or mess.

The Appeal of Using Drapes to Cover Walls


There are many reasons why using drapes to cover walls is so popular. First, drapes are easy to install. You need just a curtain rod or track, wall anchors, and screws. No heavy tools or messy drywall work are required. Second, drapes let you change your style quickly. Swap one fabric for another and get a whole new look. Third, drapes offer flexibility. You can pull them closed for privacy or light control, then open them to reveal the wall or window behind. Fourth, drapes can be layered.

Combining sheer panels with thicker curtains creates depth and adds a decorative element. Fifth, drapes are portable. If you move to a new home, you can take them with you. Sixth, drapes are cost-effective. Good quality fabric starts at reasonable prices, and installation is simple enough that many people do it themselves. Finally, drapes can make small rooms feel larger. When you drape fabric from ceiling to floor, it draws the eye up and down, making the room look taller and wider. These benefits make drapes a smart choice for both new and experienced decorators.

Benefits of Curtains as Wall Covering


Curtains as wall covering offer more than just style. One big benefit is sound control. Fabric absorbs noise, which cuts down on echoes and makes rooms quieter. This is helpful in living rooms, home theaters, or apartments with thin walls. Another benefit is insulation. Heavy curtains trap warm air in winter and block heat in summer. This can lower energy bills by reducing the need for heating or air conditioning. Curtains also protect walls. They shield paint and wallpaper from sun damage and reduce wear from furniture bumps.

Beyond practical perks, curtains add softness. Hard surfaces like plaster or brick can feel cold or sterile. Drapes introduce curves and flowing lines that balance sharp edges. Curtains also bring a sense of luxury. Think of elegant hotels where walls are covered in silk panels. You can bring that high-end feel to your own home. Fabric wall coverings are also easier to repair or replace than painted walls. If a drape tears, you can patch or swap out a panel. Finally, curtains allow for creativity. You can stencil, embroider, or dye plain drapes for a custom look. All these benefits make fabric wall coverings a wise choice for style and function.

How to Cover an Entire Wall with Curtains: Step-by-Step


Covering an entire wall with curtains is easier than you think. Follow these simple steps for a smooth result:
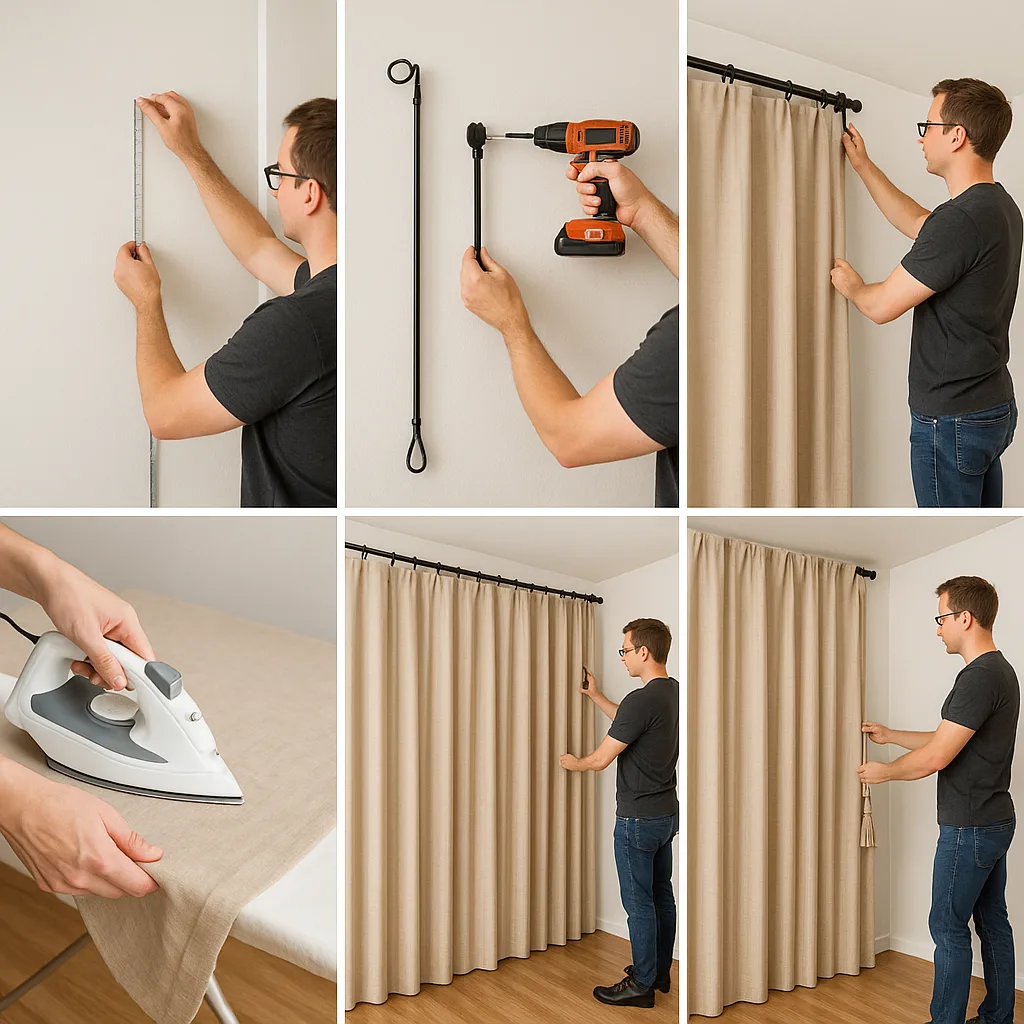
  1. Measure Carefully
    Measure the height from ceiling to floor and the width of the wall. Add extra width so the drapes can stack back when open. A good rule is 1.5 to 2 times the wall width for full coverage.
  2. Choose Your Rod or Track
    Pick a sturdy curtain rod or ceiling-mounted track rated for the fabric weight. For heavy drapes, metal tracks are best.
  3. Install Hardware
    Mark the rod or track position above the wall or flush with the ceiling. Use a level to ensure a straight line. Drill pilot holes and insert wall anchors. Screw in the brackets or track supports.
  4. Prepare the Drapes
    Iron or steam drapes to remove wrinkles. Clip or slide rings, hooks, or carriers onto the drape header.
  5. Hang and Adjust
    Place the drapes on the rod or track. Adjust the panels so they hang evenly, with gentle folds. If panels pool on the floor, that’s a soft, luxe look. For a clean finish, choose a length that just brushes the floor.
  6. Check Light and Privacy
    Close and open the curtains to test light control and privacy. Layer sheers if you want filtered light during the day and full privacy at night.
  7. Final Touches
    Add tiebacks, tassels, or holdbacks for a decorative touch. These also help stack curtains neatly when open.

By following these steps, you’ll get a wall that looks like it’s been styled by a pro, with no painting or construction mess.

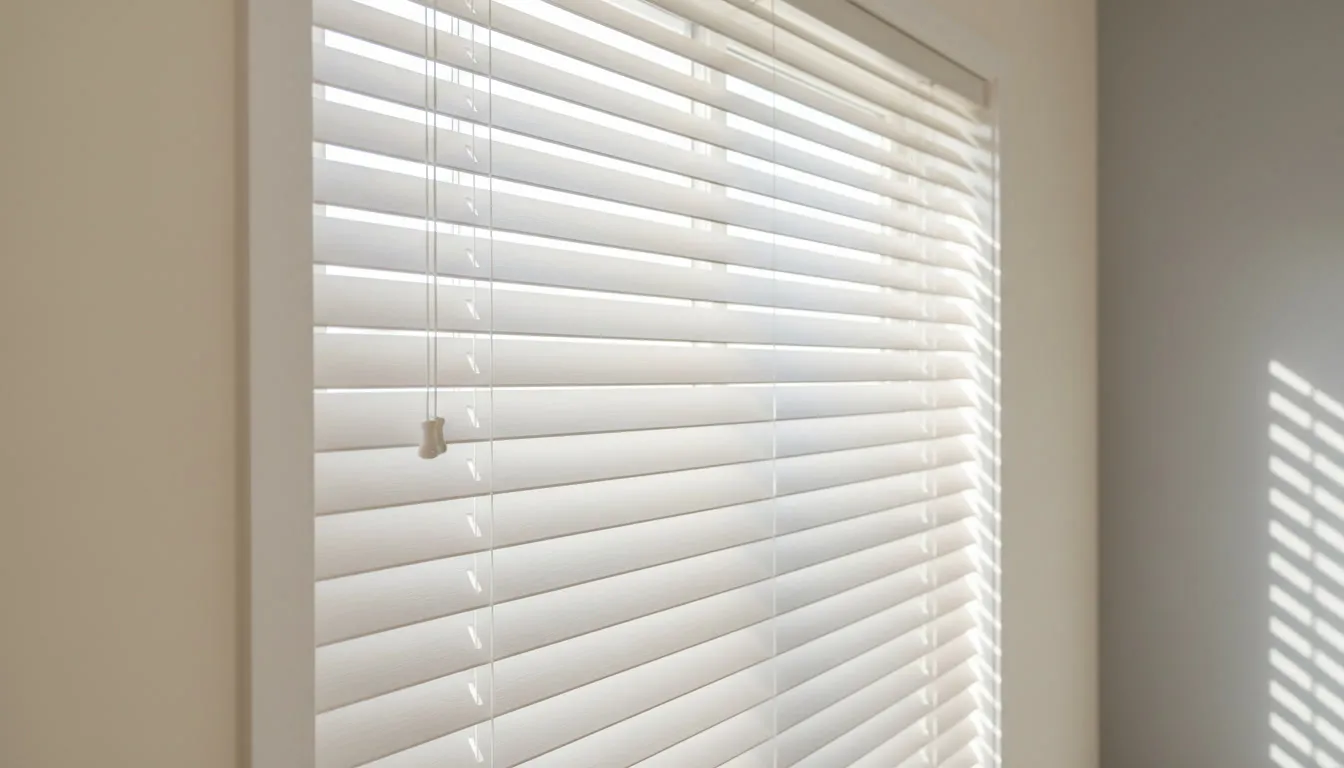
Hanging Curtains on Walls: Tools, Tips & Techniques


Hanging curtains on walls requires the right tools and a little know-how. Here’s what you need:

  • Drill and Bits for pilot holes.
  • Wall Anchors rated for the weight you plan to hang.
  • Screws or Track Supports that match your anchor type.
  • Level to keep rods straight.
  • Measuring Tape for precise spacing.
  • Pencil for marking.

Pro Tips:

  • Always use anchors if you’re not drilling into studs.
  • For very heavy drapes, install two rods or use a double-track system.
  • Place brackets 6–8 inches from the wall ends for support.
  • If your wall is brick or concrete, use masonry anchors.
  • Pre-test the weight by hanging one drape panel, then add more panels once you confirm the support.
  • Use a laser level or chalk line for long walls to keep everything perfectly straight.
  • Wear safety glasses when drilling into walls.

Techniques:

  • Ceiling Mount: For a seamless look, mount your track directly to the ceiling. This makes small rooms feel taller.
  • Wall Mount: If ceiling mount is not an option, install rods just above the wall line or window frame.
  • Hidden Track: Some tracks can be recessed into a false ceiling or cornice for a sleek, modern feel.
  • Clip Rings vs. Tab Top: Clip rings let you move panels more easily, while tab tops offer a casual, laid-back look. Choose what fits your style.

With the right gear and steps, hanging curtains on walls can be a weekend DIY project anyone can tackle.

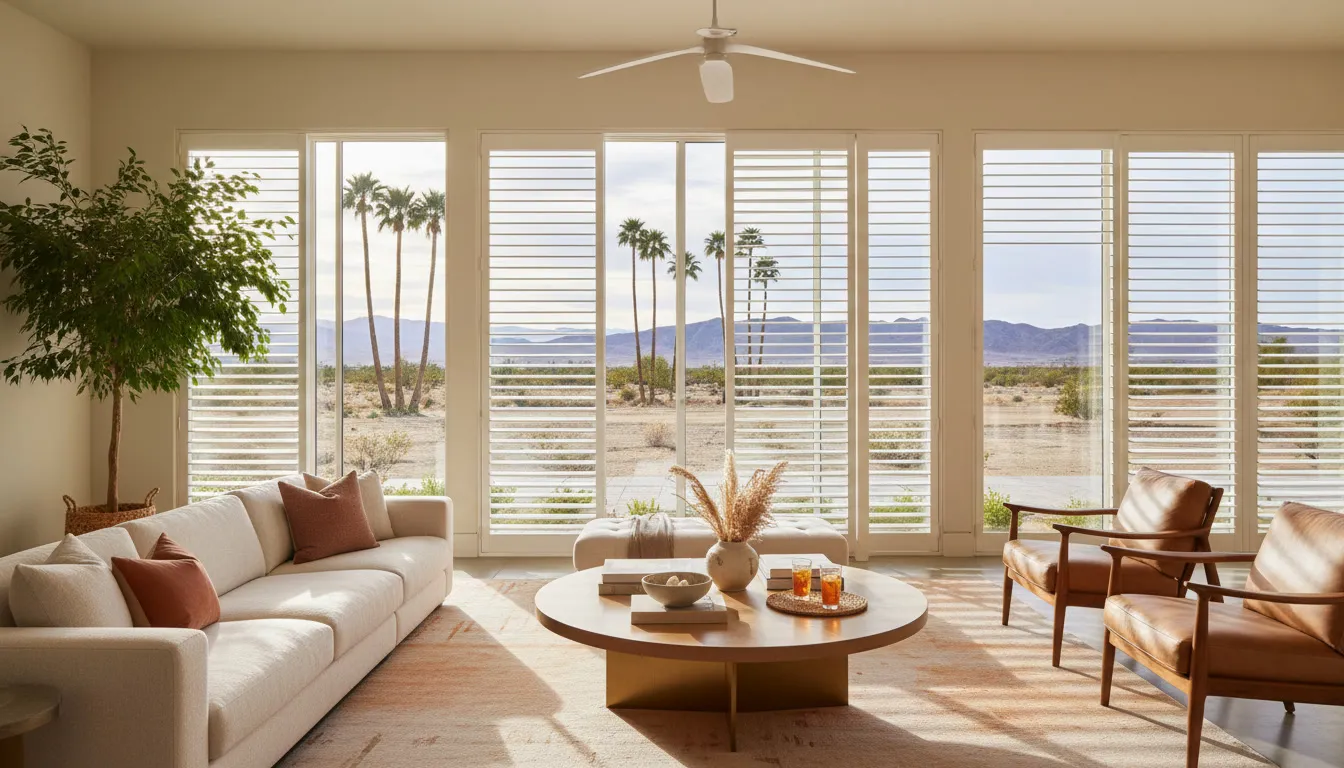
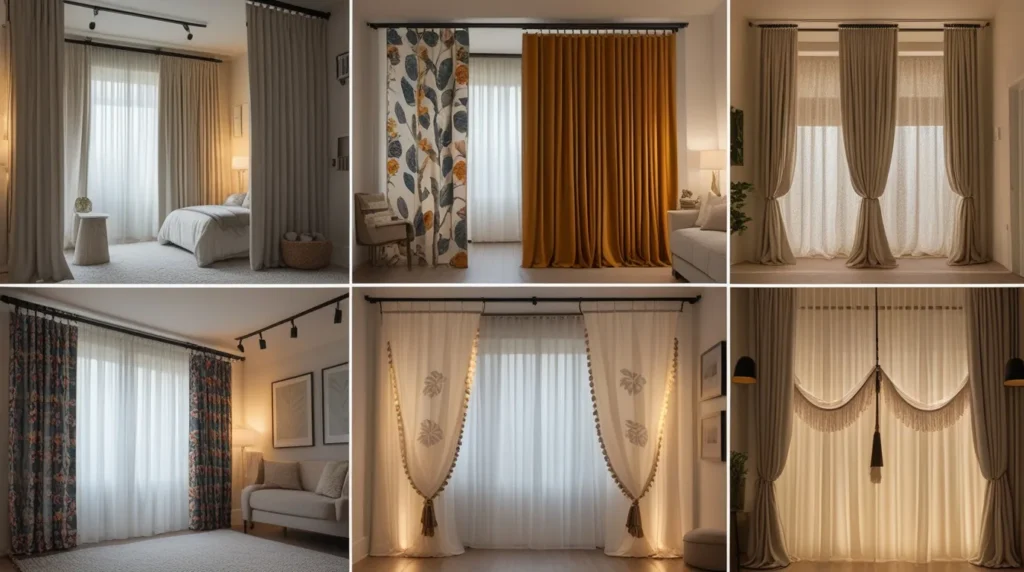
Styling with Whole Wall Curtains and Wall-to-Wall Drapes


Whole wall curtains create drama and height in any room. Here’s how to get a polished style:

  • Color Harmony: Pick curtain colors that match or contrast with your sofa, rug, or accent pillows. A bold color can be a focal point; a neutral tone blends quietly.
  • Pattern Play: Stripes, florals, or geometric prints add interest. If your furniture is plain, a patterned curtain can lift the design. If your furniture is busy, stick to solids or subtle prints.
  • Layering: Place a sheer panel closest to the wall and a heavier drape in front. This allows light during the day and privacy at night. You can also add a third layer, like a patterned valance, for extra flair.
  • Length Matters: Floor-to-ceiling drapes elongate walls. Aim for panels that just skim the floor for a clean look or pool slightly for a more opulent aesthetic.
  • Stack Back: Use tiebacks or holdbacks to reveal a bit of wall or window when curtains are open. This prevents your room from feeling boxed in.
  • Hardware as Décor: Rods, finials, and rings come in many finishes brass, nickel, black, wood. Choose hardware that complements your décor style.
  • Symmetry vs. Asymmetry: For formal rooms, hang panels symmetrically. For boho or casual spaces, hang mismatched panels or vary lengths for an eclectic look.

By styling whole wall curtains thoughtfully, you can make any room feel custom-designed.

Creative Ideas: How to Make a Wall of Curtains


A wall of curtains can feel like a soft room divider or a hidden storage door. Try these creative ideas:

  • Sliding Panels: Install a multi-track system where each curtain panel slides like a door. This works well to hide closets or open up a living area.
  • Room Divider: Hang curtains from the ceiling in a straight line to separate a bedroom nook from a living room. It’s flexible and can be pulled back when you want an open plan.
  • Pattern Mix: Use two contrasting fabrics striped and solid or floral and geometric for a bold statement. Alternate panels along the wall.
  • Tassel Trim: Sew tassels or pom-poms along the bottom edge of each panel for a playful touch.
  • Painted Panels: Buy plain white drapes and stencil a simple design leaves, chevrons, or words using fabric paint. This customizes your wall covering.
  • Lighting Behind Curtains: Hang a string of soft LED lights behind sheer drapes for a glowing effect at night. It doubles as mood lighting and adds drama.
  • Mixed Heights: Hang panels at varying heights some from the true ceiling, others from a dropped beam for an avant-garde gallery feel.

These ideas help you see curtains not just as window dressings, but as key design players that transform walls and spaces.

CV Floor & Blinds: Wall-to-Wall Curtains in Coachella Valley, CA


At CV Floor & Blinds, we know how important the right drape solution is for your home. Our Coachella Valley, CA, clients trust us to deliver whole wall curtains that fit their style and budget. We guide you through fabric selection from light-filtering sheers to blackout velvet and help install wall-to-wall drapes with precision. Our team uses professional-grade hardware to ensure your curtains hang straight and last for years. We offer in-home consultations so you can see samples in your space under real light. With CV Floor & Blinds, you get expert service, friendly advice, and a final result that looks custom-made. Let us help you turn a plain wall into a beautiful, functional feature.

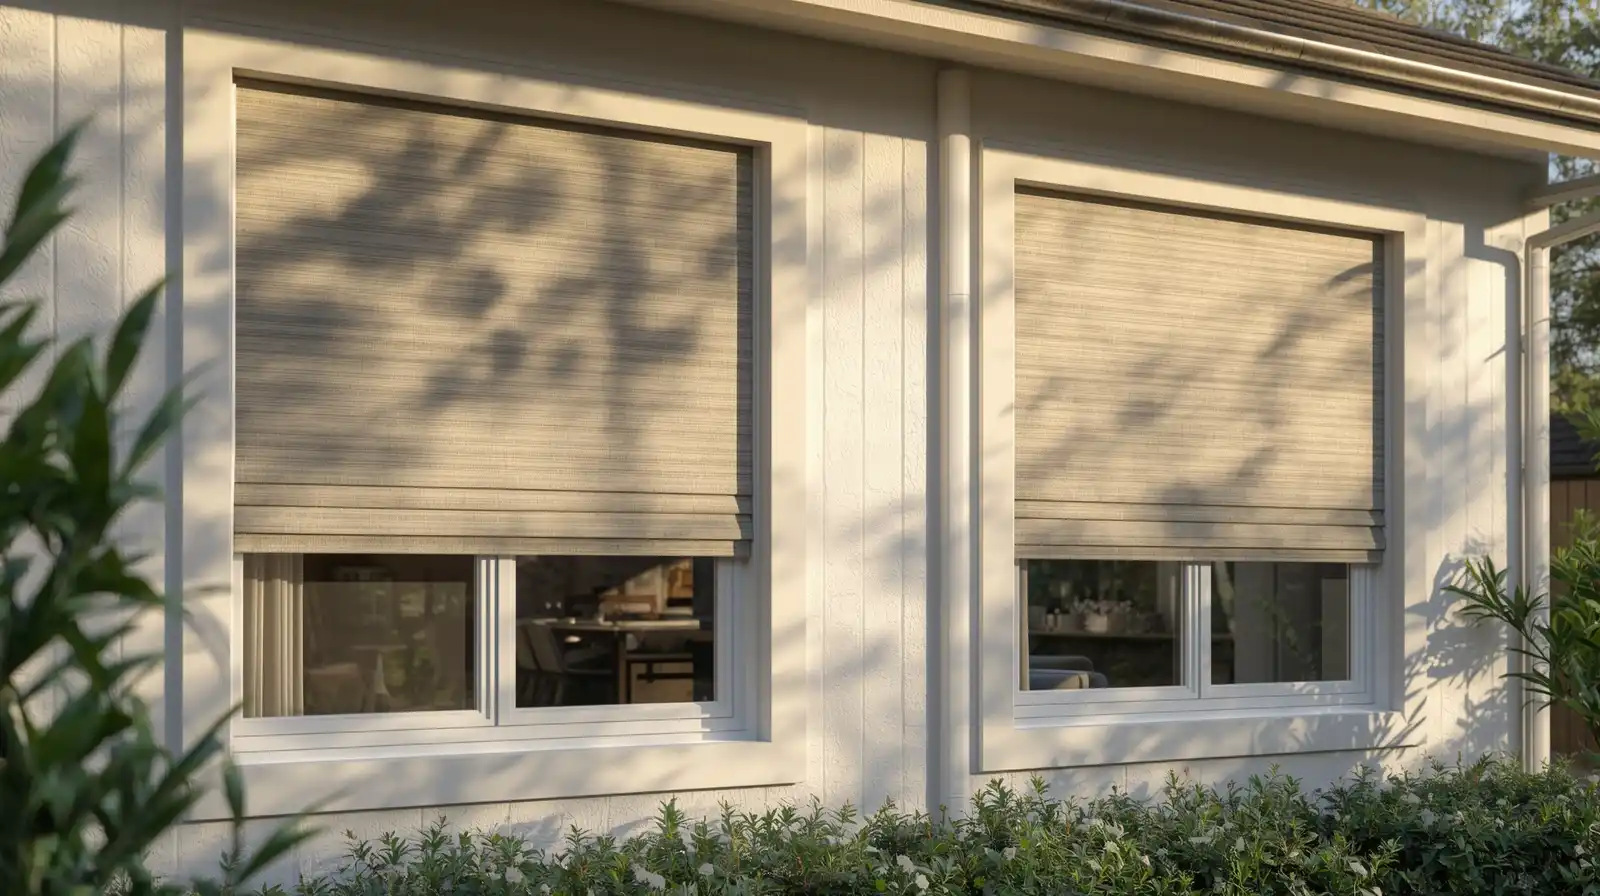
Covering Walls with Curtains: Maintenance & Refreshing Tips


Once your curtains are in place, keeping them fresh is easy. Follow these tips:

  • Regular Dusting: Vacuum drapes monthly on a low-power setting using the upholstery brush.
  • Spot Cleaning: Blot spills quickly with a clean cloth and mild soap. Test any cleaner on a hidden area first.
  • Deep Cleaning: Check fabric care labels. Many drapes can be machine washed on gentle or dry cleaned.
  • Rotate Panels: If one side faces the sun more, rotate panels every year to prevent uneven fading.
  • Refresh Rings and Hooks: Inspect hardware annually and tighten or replace any worn parts.
  • Style Update: Swap out a panel or change tiebacks for a new look each season. You can also add trim, tassels, or a decorative valance without rehanging hardware.

With these maintenance tips, your drapes will stay beautiful and functional for years to come.

Ready to transform your walls with elegant drapes? Connect with our experts today for a free design consultation and see how simple it can be to reinvent your space!

Related Post

best retractable screen door

Best Retractable Screen Door

The best retractable screen door combines smooth movement, strong materials, and smart design to protect your home from insects while keeping airflow natural and visibility clear. It should glide quietly, lock securely, and vanish neatly into its frame when not in use. A top-quality screen fits perfectly, resists wear, and matches your home’s style. This guide by CV Floor & Blinds explains what features to look for, how to maintain them, and why they are the best choice for long-term comfort and convenience. A Modern Way to Welcome Fresh Air into Your Home Fresh air brings life into every space, making rooms brighter and more comfortable. Many homeowners want this benefit without dealing with bugs or dust. Retractable screen doors provide an elegant solution. Unlike traditional hinged screens, they roll smoothly into a narrow frame when not needed, leaving the doorway completely open. The best screen doors are designed to blend into your home’s architecture. Whether you have a classic or modern design, a retractable screen adds value without changing the look. Its thin frame and clear mesh maintain your view while improving airflow and ventilation. This small addition can improve daily living. By opening your main doors during cooler hours, you can reduce air-conditioning use and enjoy natural circulation that feels clean and refreshing. Families find that spaces feel bigger, lighter, and more connected to the outdoors. Understanding Retractable Screen Doors and How They Work A retractable screen door is built around a tensioned roller mechanism housed inside an aluminum cassette. The mesh extends horizontally across the door opening and locks into place using magnetic or latch-based closures. When released, the screen retracts automatically into its frame. This structure protects the screen when not in use, keeping it safe from damage, sunlight, and wind. The mechanism is designed to handle thousands of open-and-close cycles without sticking or tearing. It is ideal for homes where both function and appearance matter. Different systems fit different door types. Single-panel models suit entry or side doors. Wider units work for sliding glass doors and patios. For double or French doors, two screens meet in the center, forming a complete seal while maintaining flexibility. Every type gives homeowners control over airflow without sacrificing security or style. What Makes the Best Retractable Screen Door Worth Investing In Choosing the right retractable screen door is about long-term performance, not just appearance. A high-quality design uses premium materials and thoughtful engineering. The best retractable screen door will have: Durability is the main advantage. Inferior products may look fine at first but soon sag or jam. Premium models are built to last more than ten years with minimal maintenance. That durability, paired with aesthetic appeal, makes them an investment rather than a short-term purchase. They also contribute to energy efficiency. By improving natural airflow, a retractable screen door reduces reliance on mechanical cooling systems. It allows homeowners to ventilate spaces naturally while keeping insects and dust outside. Best Screen Doors for French Doors: Design and Function Combined French doors are known for beauty and openness, but their double-panel design requires a special screening method. The best screen door for French doors uses a double retractable system. Two mesh panels glide from each side and connect magnetically in the middle. This design allows flexibility. You can open one side for light traffic or both for wide access. The magnets are strong enough to hold against pressure yet release easily when needed. When retracted, the entire system disappears inside slim housings mounted on each door frame. These screens preserve the architectural appeal of French doors. The mesh remains nearly invisible, keeping your outdoor view clear. For households that value appearance as much as practicality, double retractable screens are the most refined solution. Their movement is smooth, quiet, and durable enough for frequent daily use. Comparing the Best Screen Doors for Different Entry Types Different entryways require tailored solutions. Here are the key variations: Single Entry Doors Slim retractable units fit within the frame without changing door structure. They open silently and retract to one side, maintaining easy access. Sliding Glass Doors: These models feature flat, low-profile tracks that blend into the floor. Their mesh stays firm even under pressure, offering stability against wind. Patio and Balcony Doors: Wider openings benefit from reinforced frames and double-cassette systems. They can handle constant use and exposure to sunlight. Double or French Doors: As discussed, two synchronized retractable screens ensure complete coverage while keeping both doors functional. When comparing options, also consider the type of mesh. Standard fiberglass is flexible and cost-effective. Polyester or pet-resistant mesh adds strength for families with animals. For sun-exposed areas, UV-resistant material prevents discoloration and extends lifespan. Each doorway has unique demands, so it’s best to choose based on use frequency and environment. Key Features That Define the Top-Rated Retractable Screen Doors A reliable retractable screen should offer both precision and comfort. The most important features include: These features separate high-performance products from standard options. They also ensure the screen maintains its look and function even in demanding climates or frequent daily use. When all these elements are integrated correctly, the door feels effortless to use an indicator of professional engineering. Best Materials and Finishes for Modern Retractable Screens Materials define both performance and appearance. The frame and mesh should complement your home while resisting damage over time. Frame:Aluminum is the most common because it is lightweight yet strong. Powder-coating protects against corrosion and provides smooth texture. Homeowners can match it with trim color for a seamless finish. Mesh:Fiberglass mesh is flexible and affordable. Polyester mesh is tougher and holds up against scratches and pets. Fine-weave options provide better insect protection, while solar-blocking mesh filters heat and UV rays. Finishes:Choose between matte, satin, or gloss finishes to blend with your door frame. Darker tones like charcoal or bronze create contrast, while lighter shades feel subtle and modern. Proper combination of these materials makes the screen both beautiful and resilient. With good care, a quality mesh and coated frame

Read More »
how many curtain rings per panel

How Many Curtain Rings per Panel You Really Need

If you’re wondering how many curtain rings per panel you really need, the short answer is between 7 and 13 rings per curtain panel, depending on your curtain’s width, weight, and fabric type. A 50-inch-wide curtain usually looks best with 9 to 10 evenly spaced rings. This helps your curtains glide smoothly across the rod without bunching, sagging, or looking uneven. Knowing the right number of rings is key to achieving a balanced, professional appearance that enhances your space. Whether you’re styling a cozy living room or a modern office, following this simple rule ensures your drapes hang beautifully and move effortlessly. The Basics of Hanging Curtains the Right Way Hanging curtains might seem simple, but it’s one of those small details that make a huge difference in your home. The right setup changes how your windows frame light and how your space feels. When your curtains hang perfectly, they add warmth, texture, and balance to a room. Curtain rings play a big part in this. They’re the connection between your fabric and the rod, allowing you to open and close your curtains smoothly. Using too few rings can make the curtain sag and look uneven. Using too many can make it stiff and unnatural. Think of it like this: the rings are the “support team” that helps your curtains perform their best. Once you understand how to use them correctly, even an ordinary window can look designer-level. Understanding Drapery Curtain Rings and Their Role Drapery curtain rings may seem like small details, but they play a big role in how your curtains function and look. They hold the top edge of your curtain securely and allow it to glide smoothly across the rod whenever you open or close it. These rings come in different forms, such as clip rings, hook rings, and eyelet rings, each designed for a specific purpose. Clip rings work well for casual or lightweight curtains since they can be attached directly to the fabric without any sewing. Hook rings are better suited for pleated or heavier drapes where a more structured, elegant appearance is desired. Eyelet rings, on the other hand, are often used with modern drapes that already have built-in metal grommets for a clean, simple finish. When selecting your rings, pay attention to their color and finish so they match the curtain rod. Shades like bronze, gold, or matte black can completely change how your window treatment complements the rest of the room. Beyond the aesthetic side, drapery rings also help protect your fabric by spreading its weight evenly across the rod. This reduces stress on the top seam, prevents tearing, and allows the curtains to maintain their original shape for years. How Many Curtain Rings Per Panel Is Ideal? The ideal number of rings depends on your curtain size, fabric weight, and how you want it to look. A good general rule is one ring every 4 to 6 inches across the top of the panel. Here’s how to calculate: This formula keeps folds even and the curtain hanging straight. For example: If your curtain is lined or extra heavy, go toward the higher end of that range to avoid sagging. Recommended Curtain Ring Count for Common Panel Sizes Here’s a detailed table for quick reference when shopping or installing curtains: Curtain Width Ideal Number of Rings Spacing Between Rings Fabric Type 40–50 inches 8–10 rings 5–6 inches Light or medium fabric 60–72 inches 10–12 rings 5 inches Medium to heavy 84–100 inches 12–14 rings 5–6 inches Heavy drapes Over 100 inches 14–16 rings 6 inches Very thick or wide panels These measurements help your curtain maintain consistent pleats and even movement. Pro Tip: Don’t skip the end rings. They keep the curtain edges anchored, preventing curling or drooping. How Far Apart Should Curtain Rings Be? Even spacing is one of the most important details when hanging curtains because it creates balance and symmetry. Most professionals recommend placing each curtain ring about four to six inches apart. This distance allows the fabric to fall into gentle, natural folds without stretching too tightly or bunching unevenly. To measure the spacing accurately, start by laying your curtain flat on a clean surface. Measure its total width, then set aside about two inches on each end to leave room for the edge rings. Divide the remaining width by the number of spaces between rings to find the correct distance. For instance, if your curtain panel is fifty inches wide and you’re using ten rings, you’ll have nine spaces between them. Dividing forty-eight by nine gives you roughly five and a third inches between each ring, which is ideal for smooth folds. Taking the time to measure carefully before hanging your curtains ensures a professional finish. When each ring is evenly spaced, the curtains hang straight, open easily, and look clean and intentional from every angle. How Many Curtain Rings for a 50-Inch Panel? The most common curtain width in homes is 50 inches, and for that size, 9 to 10 curtain rings usually work perfectly. If you use fewer than that, you’ll notice sagging between rings. If you use too many, the curtain will feel stiff and lose its natural flow. The goal is to make sure the curtain folds gently without stretching. Here’s a simple method to get it right: Example: For a living room curtain made of medium-weight cotton, 10 rings spaced every 5 inches will create smooth folds and allow easy opening. Tip from CV Floor & Blinds: Always test one panel first. This lets you adjust spacing before hanging the entire set. How Many Curtain Clips or Hooks per Curtain Panel? If your curtains use clips or hooks instead of sewn-in rings, the same spacing rule applies. The number of curtain clips per panel should match your ring count usually 8 to 10 for a 50-inch curtain. Here’s how to get it right: Heavier drapes, like blackout or lined curtains, may need an extra clip or hook to keep the

Read More »
why are blinds so expensive

Why Are Blinds So Expensive: Full Homeowner Guide

The short answer to why are blinds so expensive is that high-quality blinds combine durable materials, precision engineering, and custom craftsmanship that cheap options can’t match. They last longer, work better, and improve your home’s comfort, privacy, and appearance. When installed by experts like CV Floor & Blinds, blinds become a smart, long-term investment that transforms how you experience your space. The Real Reason People Wonder Why Blinds Feel Like a Big Investment Blinds are one of those home features that many people overlook until it’s time to replace them. Then suddenly, the question pops up “Why do they cost this much?” The truth is, good blinds are not a simple household item. They’re engineered pieces of design that balance light, privacy, and insulation all at once. When you buy a pair of shoes, you can feel the difference between a cheap pair and a premium one after a few weeks of use. Blinds work the same way. High-end blinds are made to move smoothly every time you pull the cord, resist warping under sunlight, and still look new years later. Most people notice the price tag first, but what they’re really paying for is lasting performance, cleaner design, and professional-grade quality. Once homeowners experience the benefits, they understand that blinds are not just decoration they’re a comfort feature that improves how a home feels every day. Why Are Blinds So Expensive and Are They Really Worth It? When someone asks “why are blinds so expensive,” it’s usually because they’ve compared custom blinds to a cheap store-bought set. The difference lies in precision and purpose. Custom blinds are made for your exact windows, not a random size that almost fits. That means no gaps, no crooked edges, and no awkward trimming. This accuracy ensures that light is controlled exactly how you want it. When blinds are cut to fit tightly, they block out more heat and glare. They also move quietly and smoothly. Store-bought blinds often feel flimsy or uneven because they’re mass-produced in bulk. So, are blinds expensive? Not when you see what goes into them. You’re investing in something that saves energy, enhances your design, and functions perfectly every day. The difference is clear the moment you install them you can see and feel the quality. What Makes Premium Window Blinds Stand Out From Standard Ones Think of premium blinds like a car built with high-grade parts. The difference isn’t just what you see on the surface — it’s in how they perform and how long they last. Premium blinds use stronger slats, better coating, and smoother mechanisms. Their cords don’t tangle easily, their color doesn’t fade quickly, and they resist damage from sunlight or humidity. Standard blinds often look fine at first, but after a year or two, they may twist, fade, or stop rolling properly. They can also be harder to clean, as cheap finishes collect dust faster. Premium blinds, on the other hand, are made with materials like hardwood, faux wood, or heavy-duty fabric that stay durable for years. Over time, that quality means fewer repairs, no replacements, and a consistent, polished look that matches your home’s style. Materials That Shape the Look, Feel, and Durability of Blinds and Shades One major reason people think blinds are expensive is because they don’t realize how much materials matter. The type of material you choose affects everything the appearance, the performance, and how long it will last. Premium blinds use materials that are tested for sunlight exposure, moisture, and smooth operation. That’s part of what increases their value and explains the difference between basic and premium options. Custom Fit and Style: How Personalization Changes the Entire Experience Customization is another big reason behind the cost. When blinds are custom-made, they are designed for your windows, not a factory’s “standard size.” That means every edge lines up perfectly, every corner fits snugly, and the whole look feels seamless. Beyond fit, customization lets you choose from a range of fabrics, slat widths, colors, and finishes. You can match your home’s architecture, lighting, and color palette. That level of detail creates a balanced, finished look that pre-made blinds can’t achieve. Custom blinds also let you decide on control options manual pull cords, cordless designs for safety, or even automated controls. The more personalization you add, the better the experience and yes, the more work required from the manufacturer. But the result is something made specifically for you, not just your window measurements. Expert Installation and Why It Makes a Big Difference Even perfectly made blinds can fail without professional installation. Installing blinds isn’t just about screwing in brackets it’s about precision measurement, alignment, and safety. A small tilt or uneven fit can cause them to drag or stop rolling. Professional installers make sure the blinds sit straight, operate smoothly, and seal properly against the frame. They use the right anchors and mounting depth to avoid future issues. This level of detail takes training and experience, and that service is part of what you pay for. Think of it like having custom cabinets you wouldn’t want to install those alone. Blinds require the same professional touch for perfect function and long-term durability. The Smart Side: Motorized and Automated Blinds for Modern Living Modern technology has changed the world of window coverings. Motorized blinds are one of the biggest innovations in home comfort. With one click on a remote or app, you can open or close your blinds instantly. Some advanced models even connect to your smart home system, adjusting automatically to sunlight or time of day. This kind of automation requires small motors, sensors, and wireless integration. That’s where engineering and cost come in. The motor units, battery systems, and signal receivers all need to work together quietly and reliably. The payoff, however, is huge especially for tall or hard-to-reach windows. Automated blinds provide convenience, accessibility, and safety. They also help manage energy more effectively by responding to sunlight automatically. For many homeowners, this technology turns blinds into an everyday

Read More »
Table of Contents